- COMPOSITION NOTEBOOK
- Customization
- How to Draw a Composition Notebook: Step-by-Step Tutorial for Beginners
How to Draw a Composition Notebook: Step-by-Step Tutorial for Beginners
- Category: Customization ,
- Tags: Creative, Drawing
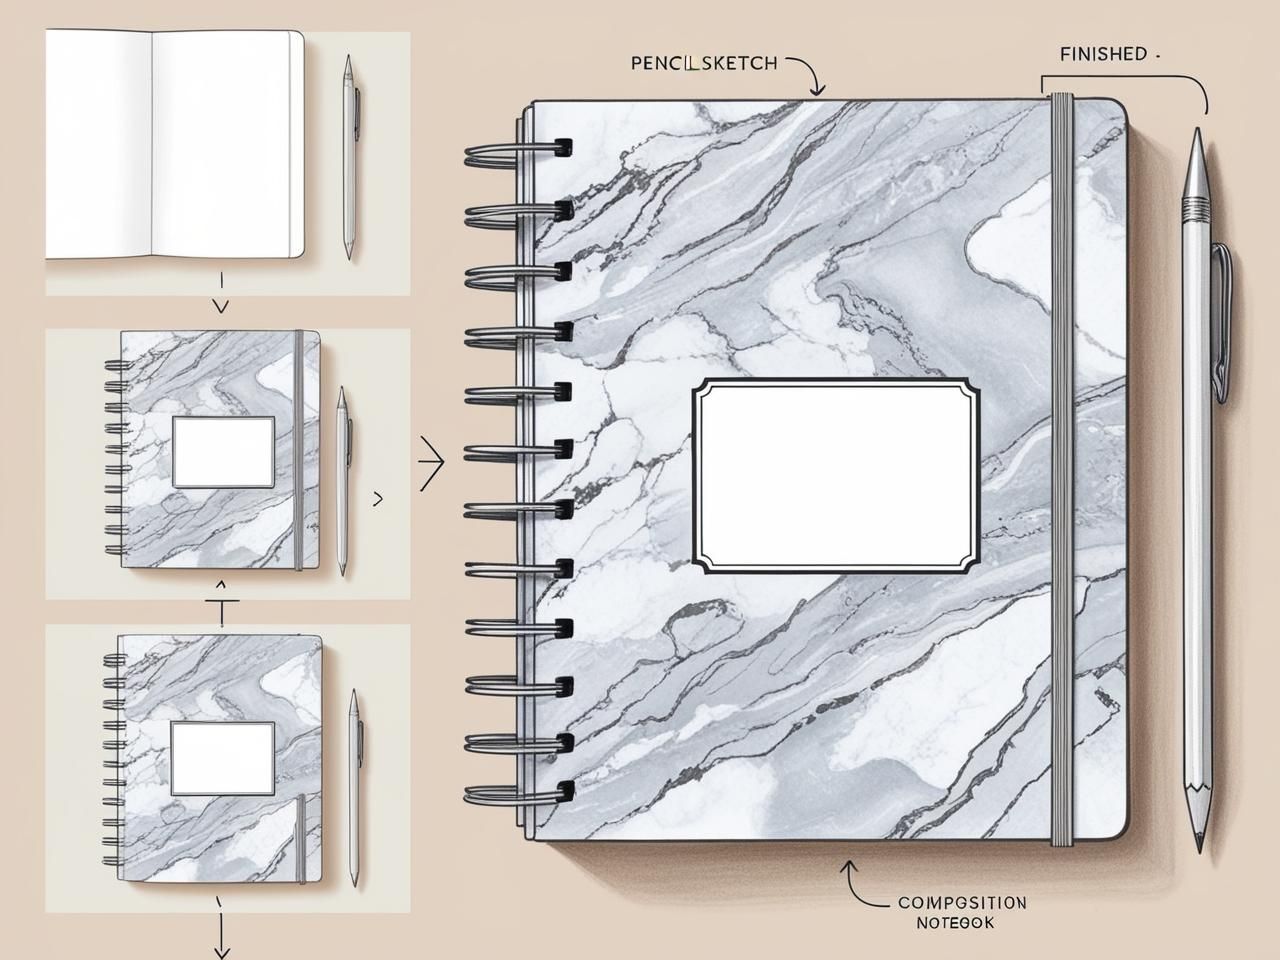
Drawing a composition notebook is a fun and creative way to practice art skills while adding unique touches to your journaling or school-themed illustrations. Whether you’re a beginner or an experienced artist, this guide will provide a simple step-by-step tutorial to help you create a realistic composition notebook design. If you’ve ever wondered how to draw a composition notebook, you’re in the right place—let’s get started!
Table of Contents
ToggleWhat You’ll Need to Draw a Composition Notebook
Basic Supplies:
- Pencil
- Eraser
- Ruler
- Black pen or fine marker
Optional Supplies:
- Colored pencils or markers for details and customizations
- Digital drawing tools, like Procreate or Photoshop, for creating digital artwork
“Gather these drawing tools for beginners before starting to ensure your composition notebook illustration turns out polished and detailed.”
Step-by-Step Guide: How to Draw a Composition Notebook
Step 1: Sketch the Outline
Use a ruler to draw a rectangle on your paper, which will represent the notebook’s cover. Adjust the size based on your desired scale, keeping the proportions realistic.

Step 2: Add the Spine
On the left side of the rectangle, draw a vertical line to mark the spine. Add small horizontal lines or dots along the spine to indicate binding stitches.
Step 3: Create the Pattern
Inside the rectangle, lightly sketch the classic marble or speckled design using random, irregular shapes. For a digital version, use brush tools or textures to replicate this effect.
Step 4: Draw the Label
Add a smaller rectangle in the center of the cover for the notebook’s label. Optional: Add text or borders inside the label for personalization.
Step 5: Add Details
Include lines or shadows along the edges of the notebook for depth. Draw small stickers, doodles, or decorative elements to make your notebook unique.
“When creating the speckled pattern, focus on keeping the shapes random and varying in size to achieve a natural look.”

Tips for Drawing a Realistic Composition Notebook
1. Use Shading for Depth
Add light shading around the edges of the notebook to make it appear three-dimensional.
2. Mimic a Glossy Cover
Draw subtle highlights or reflections on the notebook’s surface to give it a polished look.
3. Customize the Design
- Add a name or subject title to the label for a personalized touch.
- Use colored pens or markers to replicate colorful modern notebook designs.

Common Mistakes to Avoid When Drawing a Composition Notebook
1. Uneven Proportions
Ensure your rectangle is symmetrical and that the spine is evenly spaced.
2. Overcomplicating the Pattern
The marble effect should remain random and simple—don’t try to make it too perfect.
3. Forgetting to Add Details
Small details like stitching, shadows, or customized labels make the notebook look complete and realistic.
“To avoid uneven lines, use a ruler for straight edges and take your time outlining the notebook’s frame.”
Creative Ideas for Notebook Drawing Projects
1. School-Themed Artwork
Incorporate the notebook drawing into a larger illustration of a school desk or backpack.
2. Bullet Journal Designs
Use your composition notebook drawing as part of a bullet journal spread for a school or study theme.
3. Digital Art and Stickers
Transform your drawing into a digital design for stickers, prints, or other creative projects.
“Turn your composition notebook illustration into a personalized sticker for decorating your real-life notebooks or devices.”

Conclusion: Start Drawing Your Composition Notebook Today
Drawing a composition notebook is an easy and enjoyable project for artists of all skill levels. With just a few materials and these simple steps, you can create a unique, realistic composition notebook illustration that’s perfect for journaling, art projects, or digital designs. Grab your supplies, let your creativity flow, and start drawing your own composition notebook today!
RELATED POST
Composition Notebook by Pieffeweb | Cookie Policy | Privacy Policy | Disclaimer


